|
|
In 1973, i received my first introduction to the Camera Obscura, there was some partial eclipse happening and i built an eclipse
viewer out of a shoebox. What i saw reminded me of when i was still in diapers laying in my crib and seeing moving images
that were upside down being projected on the walls of my room. the images were blurry and distorted, probably because my minimal
vision was not detected until the Eye Test in Kindergarten. I sometimes wonder how i got around. i do know that my sense of
hearing, smell and touch are of far greater sensitivity than the average person.
1974, there was a do-it-yourself
pinhole camera make-it kit in the National Geographic "World Magazine", i kept it for a long time.
1983
when i decided to construct it and try to take a picture. it was a basic square box that attached on to a 126 cartridge of
film... i used black electrical tape. i used a nickel to advance the film (Kodachrome 64), the slides turned out dreamy looking
and quite dark.
1985, Art 230, University of Washington-i made a pinhole camera from discarded materials at the
lab, it was real cheap to do photography this way. [people always stared at me when i was out taking pictures](half the fun)
at one time i had made 125 pinhole cameras of all sizes. it took me quite a while to figure out if they all worked. about
35 were "good pokes" meaning holes that were just right, and equivalent to a f16/aperture. my subjects were toys
and what ever i could find in the yard.
1993, i began to explore pinhole photography as a serious study of light
on film. i had 150 working film cannister cameras divided up by their apertures and catalogued them by how they each performed
in sunny, overcast or rainy days. i tried to take 4 pinholes photos a day for the entire year. ( 1 out of 4 shots is usually
the good one)
i save all of them, there are no such things as mistakes.

|
|
|
|
|
|
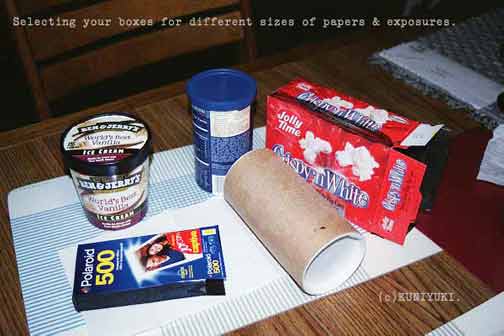
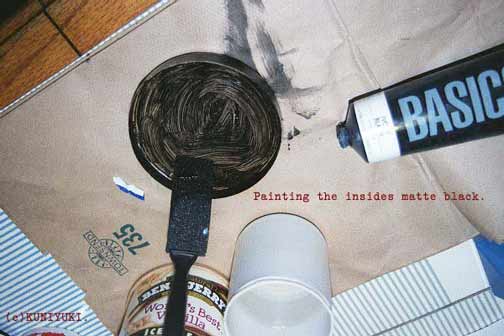
| Find suitable containers- ones with lids work best |
|
| Paint insides with black opaque paint. |
|
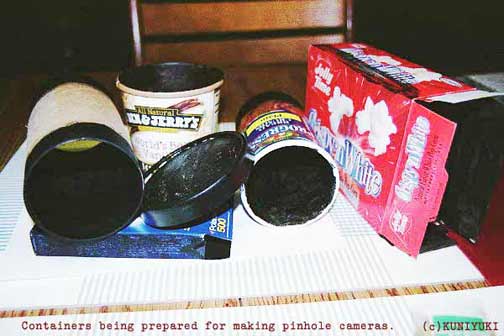
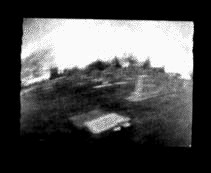
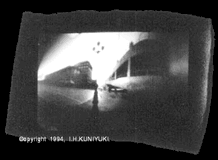
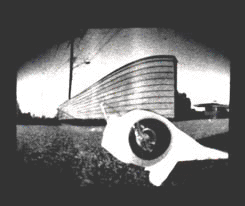
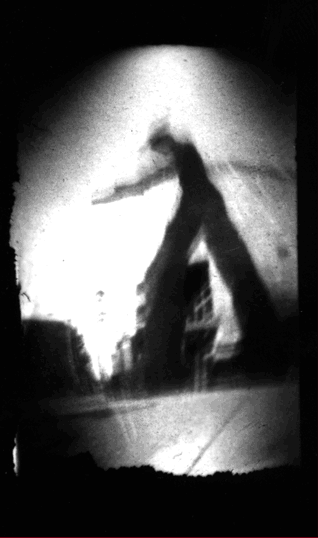
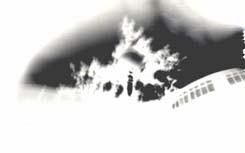
Film Can Cameras made these Pinhole Photos !

|
|
|
|
|
|
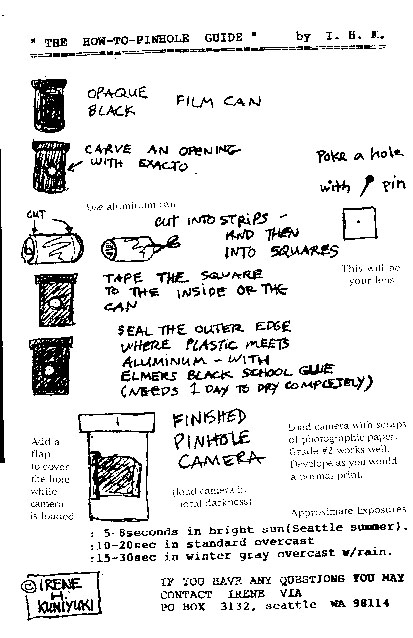
1) Collect the discarded black plastic film Cannisters from your local photo lab, i've noticed that the Kodak types work better
( the plastic is softer ).
2) Find the center of the cannister scratch an X at the centerpoint between the lid and
the base.
3) Then take an exacto angled blade and cut out the area of the X --it should only be the size of a 1/8"
dot. Angle the blade so that the bevel is as flat as you can get it.
Put them aside and start on the hardest part.
4) Find an empty clean aluminum beer can ( they seem slightly thinner than the soda cans. take a old pair of scissors
stab it into the side of the can, its easier to start i 1/2" from the top seam. Stab the scissors in and start to cut
all the way around and pull of the top part, then turn the open end towards you and cut away from you.
When you get to
the opposite end of the can turn the scissors to the left and continue to the the other side.
6) Now you have a kind
of rectangle piece of aluminum.
7) Cut that piece of aluminum into 1/2" squares.
8) Get some thick
cardboard or a magazine and put the squares silverside up and take a "map tack" or other fine pointy object and
proceed to stab tiny holes in your squares of aluminum. One hole per square.
9) Hold each square up to the light
and sort them into piles of holes, from tiniest to biggest. big is bad. If the hole is as big as the dot in these i's then
you've gotta stab quicker and faster! Put your sorted pinholes into the clear film cannisters and label accordingly.
10) Fitting your cameras with lenses. Take one square and hold it up to the bigger hole in the black plastic cannister.
Make sure that you are matching the square up with the curve. Take it out and draw a circle around the pinhole, and get your
black photo opaque tape ( cut off one inch worth, little more maybe) place the tape on the square
with the curve,( silvery
side facing inside). Put tape all around the square, make sure no light other than your pinhole passes through.
10)
Take a strip of black opaque tape and pull out enough to cover the hole and your pinhole, keep a small amount for the flap
you'll grasp during your exposure. take another strip of tape and place it at the otherside of the flap you made, tape it
going vertical, that's to secure it.
This main flap is your lens cover, don't mess it up. IF it gets ragged, then you'll
have to replace it in 6 months on a regular schedule.

|
|
|